The general purpose GPIO pins included on Raspberry boards serve as a connection interface to the outside world.
To start using them, it is necessary to understand that their main function is to provide digital inputs and outputs, with which to control programmable electronic components such as sensors and motors, with Python libraries or any other programming language chosen by the user being very helpful. .
On this occasion we refer to one of the basic projects with which to get into the electronic applications of Raspberry computers.
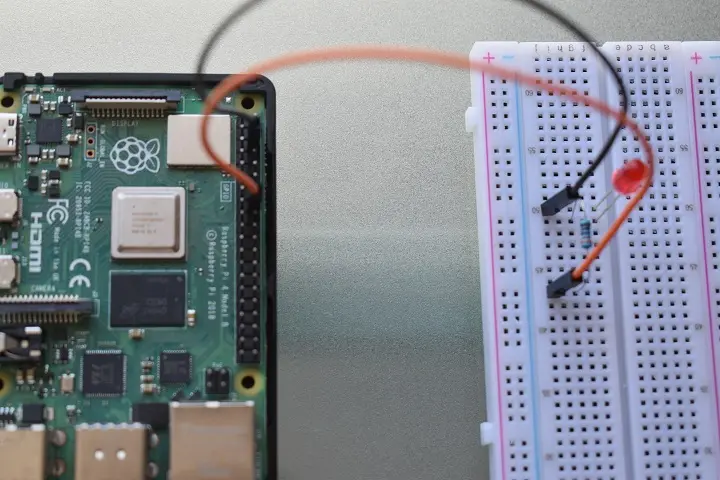
Hardware required
1 Raspberry Pi 4, 1 x 5mm LED, 1 resistor 330 ohm, 1 prototyping board, male/male, female/male jumpers.
What is an LED?
An LED is a semiconductor that emits light when current is passed through it. Its operation is similar to that of a light bulb, except that it only allows the flow of current in one direction: from the positive pole (anode) to the negative pole (cathode).

How many amps can a 5mm LED support
Most 5mm LEDs support current intensities between 20 mA and 30 mA. This value is less than that provided by the Raspberry pins, so it must always be accompanied by a resistor.
How many volts does an LED consume
The voltage used by an LED when it is on (forward voltage) ranges from 1.85 V to 2.5 V. An average value would be 2.2 V.
Calculation of the resistance for a 5 mm LED
In order not to burn out the LED, it will be necessary to use a resistor between it and the GPIO pin to which we connect it.
The resistance value is calculated using Ohm’s law (V=I*R) and Kirchhoff’s voltage law. The latter holds that the voltage supplied to a closed circuit must be equal to that consumed.
The data we know is the voltage supplied by the pins (Vs= 3.3 v); the voltage used by the LED (Vled= 2.2 v); the typical current intensity (I= 0.02 A).
According to Kirchhoff’s law:
Vs = Vled + Vr ===> Vr = Vs – Vled
Applying Ohm’s law to resistance:
Vr = I*R ===> R = (Vs – Vled)/I= (3.3 – 2.2)/0.02= 55 Ω
The resistance value obtained is 55 Ω. But we can use a larger value. Just keep in mind that the higher the value of the resistor, the lower the brightness of the LED.
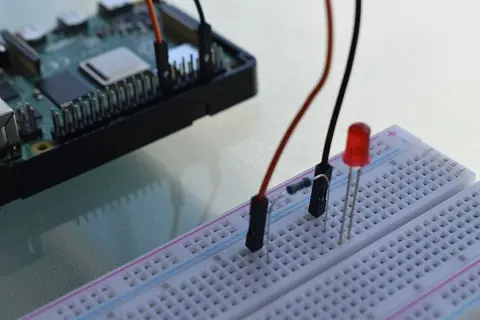
Circuit wiring
Using the breadboard and wires, connect the shortest leg of the LED to the GND pin. Next, connect the longest pin to a 330 Ω resistor. Connect the other end of the resistor to GPIO pin 23.
Python code for blinking an LED
Next we will present 3 Python scripts that allow a Raspberry to blink an LED. In the first two we will use the GPIO Zero library and in the rest the RPi.GPIO library.
Script 1
from gpiozero import LED
from time import sleep
led=LED(23)
while True:
  led.on()
  sleep(1)
  led.off()
  sleep(1)
Script 2
from gpiozero import LED
from signal import pause
led=LED(23)
led.blink()
pause()
Script 3
import RPi.GPIO as GPIO
import time
GPIO.setmode(GPIO.BCM)
GPIO.setup(23, GPIO.OUT)
while (True):
  GPIO.output(23, True)
  time.sleep(1)
  GPIO.output(23, False)
  time.sleep(1)