On the top of the current Raspberry Pi boards you can find a series of connectors that allow you to install accessories and sensors with which to make the most of the possibilities offered by this mini computer. One of these connectors is the camera port.
Where is the camera port located on Raspberry Pi 4?
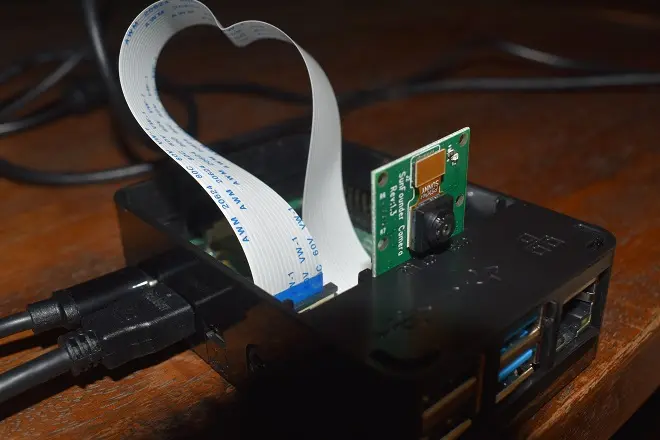
The camera port is located between the audio jack connection and one of the HDMI outputs. Through this port, the official camera of the Raspberry project is connected, whose price ranges around thirty euros and is marketed through the official channels of the Raspberry Foundation.
The official Raspberry PI 4 camera
The official Raspberry Camera, currently version 2.1, comes packaged on a small board and is provided with a flexible ribbon that fits uniquely onto the connector. It has an 8 Mpx Sony image sensor so it is capable of capturing images and video in high resolution.
Its possibilities, together with the software possibilities of the Raspberry system, also allow you to create videos with ingenious effects or use it as a video surveillance system, among many other things. But to be able to be controlled from the computer it is not enough to connect it to the module in which it is integrated to the Raspberry board. After this it is necessary to make some adjustments in the configuration options menu of the Raspberry operating system.
Steps to install the camera on Raspberry Pi 4
These are the steps you need to follow to use the camera module on Raspberry.
The first step is to update the operating system of your Raspberry to its latest version. For this, open the terminal and execute the following commands one by one: sudo apt-get update. Then sudo apt-get upgrade.
Once you have updated the operating system, proceed to activate the camera through the Raspberry configuration options. To do this, open the terminal and run the command: sudo raspi-config
In the window that opens, select Interfacing Options. Then select Pi Camera and press Enter. Finally, click Yes or Enable.
How to take photos with the Raspberry Pi 4
To check that the camera is working properly, try taking a photo with the raspistill app. This is very simple, you just have to open the terminal and execute the command raspistill -o image1.jpg.
SEE ALSO: