Recover files from a dead computer with SystemRescueCD.

SystemRescueCD is a Linux distribution designed to access a locked system and be able to do file recovery tasks, edit partitions, among other things. It works like a bootable USB or DVD disk, so no installation is required. And he can do it on any computer with an inaccessible hard drive, regardless of its current operating system. In addition, it offers support for most file systems, including those used by Windows. Here’s how to use it to recover files from your troubled hard drive. The procedure is very simple, but first it is necessary to install SystemRescue on a USB stick.
Install SystemRescueCD on a USB stick
First of all, download SystemRescueCD from the following link: https://www.system-rescue-cd.org/Download/
Run Rufus from a Windows computer. In the Rufus interface, go to Device and select the USB stick to which you are going to record SystemRescueCD.
Under Boot choice, select Disk or ISO image. Then use the SELECT box to add the ISO file of the SystemRescueCD that you just downloaded.
Select MBR as the Partition Scheme, and BIOS or UEFI as the Target System. Finally click on Start.

Recover files from corrupted Windows
Once you have obtained a bootable USB stick with SystemRescueCD, insert it into the inaccessible computer and turn on the system. Before, make sure you have changed the boot order in the BIOS or UEFI interface of the system. This interface can generally be accessed by pressing the F1 or F2 key immediately after turning on the computer.
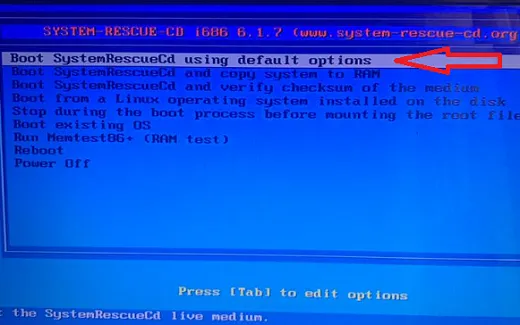
When the SystemRescueCD window appears on the screen, select Default Boot Options.
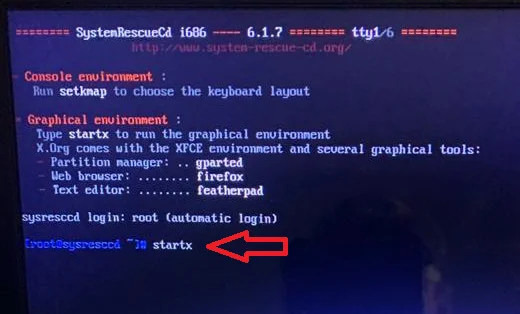
Wait for the system to load. When it stabilizes, enter the Startx command and press Enter to bring up the SystemRescueCD graphical interface.
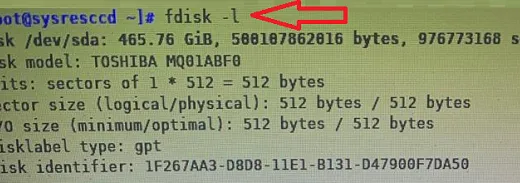
Go online if you need to. Next, identify the partition where the photos or files you want to recover are located. To do this, open a terminal and enter the command fdisk -l followed by Enter.
Next create a folder in which you will mount the desired partition (dev/sda3, for example). To do this, click on the Start menu and select File Manager. From the File menu, select Create Folder. Enter the name and press Create. Repeat the same step inside the created folder to create a subfolder. For example, photos/george.
Once the folder is created, open a terminal and mount the dev/sda3 partition in the photos/george folder. To do this, open a terminal and run the following command: mount/dev/sda3 photos/george.
Now you can access from SystemRescueCD to the files in your inaccessible Windows folder. You should only use File Manager to manage them. You can copy them to a USB memory or upload them to your Google Drive account.
Image par Karolina Grabowska from Pixabay