Your most recent purchase was a Hisense TV? So, it is normal that you feel anxious to unpack it and check the benefits described by the seller.
But before doing so you must configure your Internet connection. From there you can access the streaming services included in the factory or download those that are available for the operating system that controls your television.
You will also be able to download and install the latest software updates, among many other tasks
Internet connection via Ethernet port
There are two options for this. The first is to use the Ethernet port on your TV and connect it via network cable to your router. A fairly simple task and for which no configuration is required.
In addition, it is the optimal connection method as long as the television is quite close to the router because otherwise it will be inevitable to have cables scattered around the room.
Wi-Fi Internet connection
The second option requires a little more effort since it is about connecting the TV to the Internet through a wireless network, which is equivalent to entering its configuration menu and knowing the name and password of the Wi-Fi network. However, it is a very simple procedure that differs depending on the Hisense TV model.
We show you the steps to follow for each of the Hisense television models that are currently sold.
How to connect your Hisense Vidaa TV to Wi-Fi
Turn on your Hisense television and use its remote control to enter the Settings > Network section. In this options menu, select Network Settings. Under Connection Type, select Wireless.
The available Wi-Fi networks will immediately appear on the screen. Select your Wi-Fi network and enter the respective password.
How to connect your Hisense Android TV to Wi-Fi
New Hisense Android TV
Turn on your Hisense TV equipped with Android TV. If it has not been configured for the first time, the start menu will appear.
In this case, select your language and country preferences. Next, you will be shown the option to connect to the Wi-Fi network and your Google account using the information you save on your Android phone.
If you want to do it this way, select Continue and follow the prompts. Otherwise, select Skip. Once the available Wi-Fi networks appear, select the one that corresponds to your router and enter the password. Then continue with the TV setup process.
Hisense Android TV in use
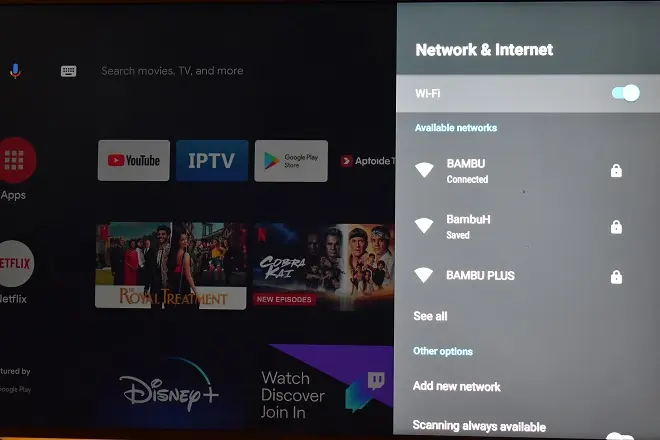
On the other hand, if your Hisense Android TV is already fully operational but the Wi-Fi connection is not configured, follow these steps.
Press the Home button on your remote, and then select Settings (gear icon at the top right of the screen). Next, select the Network and Internet option and activate the Wi-Fi function. To finish, select your wireless network and enter the respective password.
How to connect your Hisense Roku TV to Wi-Fi?
Turn on the device. If your Hisense Roku TV hasn’t gone through the startup setup process yet, enter the information prompted until the wireless network setup option appears.
Select your Wi-Fi network, enter the password, and follow the on-screen prompts to complete the Roku TV OS startup setup process.
Now, in the event that the TV is working without a wireless Internet connection, follow these steps.
Turn on your Hisense Roku TV and press the Home button to enter the main interface of the Roku system. Then select Settings > Network > Set up connection > Wireless. Choose your Wi-Fi network and enter the password.
SEE ALSO:
How to access Google Drive on Android TV
My WiFi Network does not appear in network list. How to fix it?