
Let’s break down Anaconda, Miniconda, and Conda in a really straightforward way—think of them as essential tools or helpers in the world of data science and software development.
Anaconda: The All-Inclusive Toolkit
Imagine you’re going camping and you have a backpack that contains everything you might need—tent, sleeping bag, stove, food, and so on. Anaconda is like that backpack for data science and software development. It’s packed with over 1,500 tools (we call them “packages”) that are commonly used in these fields, such as libraries for math, science, and data analysis. This means you don’t have to pack anything yourself; it’s all ready to go.
It’s perfect for anyone who wants a fully equipped setup without the hassle of assembling it piece by piece, even though it takes up about 3 GB of disk space due to its extensive library.
Here’s a brief overview of some key tools included in Anaconda:
TensorFlow: Think of it as a super clever toolkit developed by Google. It’s used for creating brain-like systems called neural networks, which can learn tasks like recognizing speech or categorizing photos. TensorFlow helps you build and teach these systems in a straightforward way.
NumPy: This is like having a super calculator that can handle not just big, but huge calculations. It deals with complex mathematical problems, especially those involving large groups of numbers arranged in tables or grids, making it a fundamental tool for scientific research.
Pandas: If TensorFlow is your brainy kit and NumPy your super calculator, then Pandas is your magical ledger. It’s excellent for organizing data, like sales reports or sports scores, into tables making it easier to sort, analyze, and make sense of large datasets.
Matplotlib: This tool is your artistic kit. It lets you create a wide range of graphs and charts. Whether you want a simple line graph or a dynamic interactive plot that changes with new data, Matplotlib helps you visualize data in whatever form you need.
Scikit-Learn: This is your prediction wizard. Based on data you feed it, like historical weather patterns, it can help predict future trends, such as a forecast for a rainy day. It uses NumPy and Matplotlib, among others, to help sift through data and learn from it, making it invaluable for predictive analysis.
Miniconda: The Lightweight Backpack
Now, imagine you only need a few things for your camping trip, so you pick a smaller backpack and only pack the essentials. Miniconda is like this smaller backpack. It comes with just the basics—Python, a package manager named Conda, and a few other tools. You decide what else you need and add packages as you go. It’s great for people who want to keep their toolkit light and add only what they need, when they need it.
Conda: The Essential Organizer
Conda is like the organizer or the planner for your tools. It’s part of both Anaconda and Miniconda. Its job is to manage all the tools (packages) you have and make sure they work well together. It helps you set up separate environments for different projects to make sure that the tools for one project don’t mess up another. This is crucial when you’re working on multiple projects at once and need to keep them organized and running smoothly.
Why Are These Tools Useful?
In data science and software development, using these tools can help make sure that everything you’re working on will work the same way on any computer. This is important for teamwork and sharing your work, as it ensures that everyone is literally on the same page, and there won’t be issues like “Well, it works on my machine!”
Anaconda, Miniconda, and Conda help keep everything neat and tidy, allowing you to focus more on your projects without worrying about setup and compatibility issues. Whether you choose the full package with Anaconda, the customizable approach with Miniconda, or the efficient management with Conda, these tools are about making your life easier and your work more effective.
How to Install Anaconda and Miniconda
Installing Anaconda and Miniconda on your computer is a straightforward process. Here are the steps for both Windows and macOS.
Installing Anaconda
For Windows:
Download the Installer: Visit the Anaconda website and download the Anaconda installer for Windows.
Run the Installer: Open the downloaded file to start the installation. Click “Next”, agree to the terms and conditions, and follow the prompts to choose the install location (the default settings are recommended).
Installation Options: You’ll have the option to add Anaconda to your PATH environment variable. It’s recommended to avoid this to prevent conflicts with other software. Instead, access Anaconda through its dedicated prompt. You can choose to make Anaconda your default Python installation, though this is optional.
Complete the Installation: Click “Install”, and once the process is completed, you may optionally install PyCharm, a popular IDE that integrates with Anaconda.
Verify Installation: Search for and launch Anaconda Navigator from the Start menu to ensure it’s properly installed.
For macOS:
Download the Installer: Download the Anaconda installer for macOS from the Anaconda website.
Run the Graphical Installer: Open the downloaded file and follow the on-screen instructions, dragging the Anaconda icon into your Applications folder as directed.
Verify Installation: Open Anaconda Navigator from the Applications folder to confirm it’s ready to use.
Installing Miniconda
For Windows:
Download the Installer: Go to the Miniconda website and select the installer for Windows.
Run the Installer: Execute the downloaded file and follow the on-screen prompts, including terms agreement and installation location. Decide if you want to add Miniconda to your PATH.
Finish Installation: Click “Install”, and after it completes, select “Finish”.
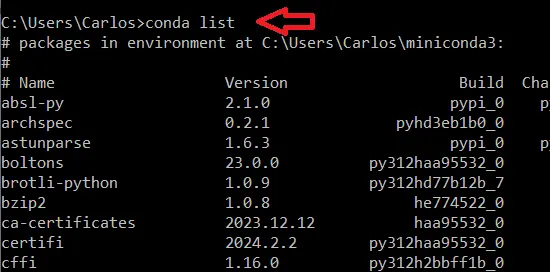
Verify Installation: Open Command Prompt (Windows + R, cmd, Enter) and type conda list to display a list of installed packages, confirming Miniconda’s installation.
For macOS:
Download the Installer: Navigate to the Miniconda website and download the installer for macOS.
Install via Command Line: Open a Terminal window. Navigate to the download directory.
Initiate the installation by running bash Miniconda3-latest-MacOSX-x86_64.sh and follow the instructions.
Verify Installation: In Terminal, execute conda list to see the installed packages, ensuring Miniconda is installed correctly.