What is ESP32?
The ESP32 is a versatile microcontroller celebrated for its WiFi and Bluetooth capabilities, making it a prime choice for Internet of Things (IoT) projects. This affordable yet potent device smoothly integrates a variety of features that accelerate the development and deployment of connected devices.
Designed by Espressif Systems as an upgrade to the ESP8266, it boasts an array of GPIOs, faster WiFi, dual-core processors, and enhanced peripherals. It is widely used in smart home devices, industrial automation, and wearable technology.
Characteristics of ESP32
The ESP32, a robust foundation for IoT projects, marries advanced features with energy efficiency. It features a dual-core processor that runs up to 240 MHz and supports integrated WiFi and Bluetooth 4.2/5.0 BLE for extensive connectivity options.
The device also offers a significant 520 KB of SRAM and can accommodate external flash memory to expand storage options further. With up to 36 programmable GPIO pins supporting various protocols such as SPI, I2C, UART, ADC, and DAC, the ESP32 is highly adaptable across a wide range of applications. Its low power consumption modes are vital for enhancing battery life in portable applications.
Fixing the “ESP32 Not Recognized” Error
Integrating the ESP32 with a computer may sometimes involve navigating through driver issues with the CH340 or CP210x chips. These chips are essential for USB-to-serial conversion—a critical step for programming the ESP32.
Identifying which chip your ESP32 uses can be achieved through a visual inspection of the chip near the USB port and confirming the chip type, such as CH340 or CP210x.
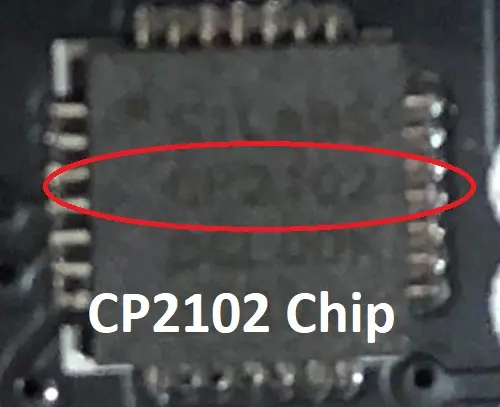
Further verification can be found in the datasheet or technical documentation of your specific ESP32 model, which lists the chip used along with its capabilities and specifications.
Installing ESP32 Drivers on Windows and Mac
CH340 Chip
For Windows, to install CH340 drivers, begin by downloading the CH341 SER installer from the manufacturer’s website. Before installation, remove any older versions to prevent conflicts.
Run the installer and follow the instructions closely. Verify the installation by checking the CH340 port in the Device Manager or Arduino IDE. This process ensures compatibility with various Windows versions.
On Mac, download the CH340/CP210x macOS driver, open the terminal, run the installer using command-line instructions, and restart your Mac. After restarting, connect your ESP32 and verify the installation in the System Report to ensure the USB is recognized.
CP210x Chip
For the CP210x drivers on Windows, download the CP210x Universal Windows Driver. Unzip the file, locate the driver folder using File Explorer, right-click on the silabser.inf file, and select Install. Follow the installation guide to complete the setup.
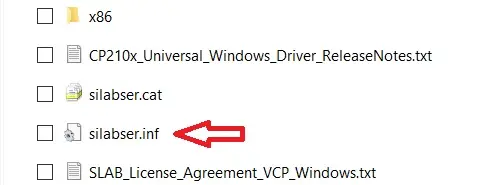
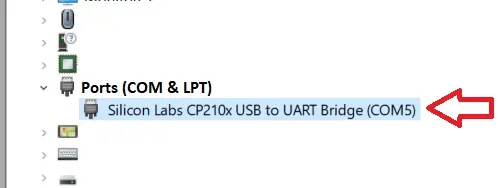
Confirm the installation by checking the CP210x port’s presence in the Windows Device Manager.
Using ESP32 from Arduino IDE
To program the ESP32 using the Arduino IDE, begin by adding the ESP32 board add-on. Open the Arduino IDE, navigate to Tools > Board > Board Manager, search for “ESP32” and install the latest version from Espressif Systems.
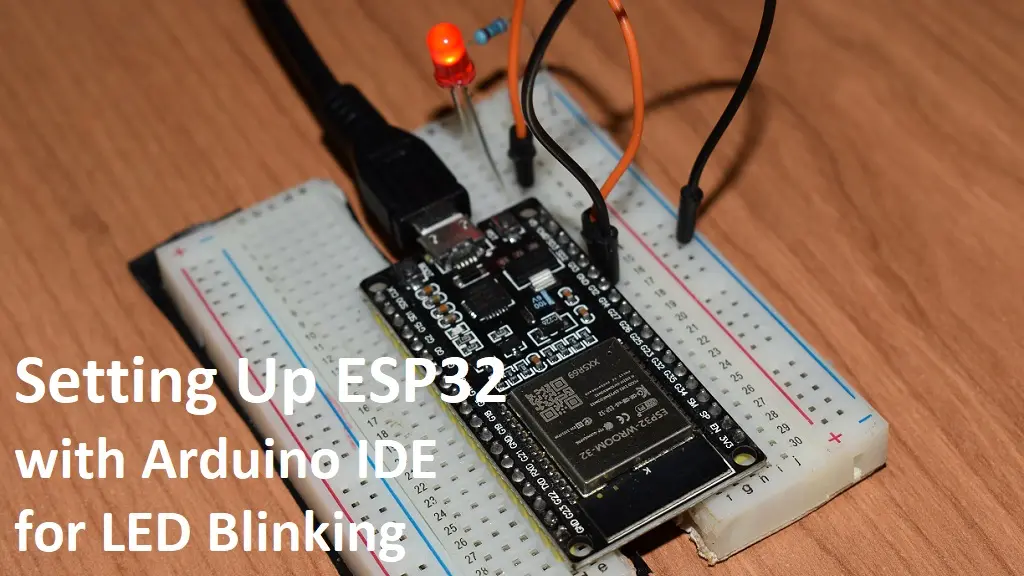
For a beginner project like blinking an LED: connect the LED to a GPIO pin on the ESP32, adjust the blink code in the IDE to use the correct pin, compile and upload the code, then observe the LED blinking as per your script’s timing.
This initial project is an excellent way to become familiar with programming the ESP32 using the Arduino development environment, setting a solid foundation for more complex IoT applications.